

Directions
It’s July! And almost the 4th, which means it’s time to get your 4th of July plans in order! This deceptively simple dessert is sure to knock your family’s socks off. All you need are a few simple ingredients, and a little bit of time. It’s fresh, light, and really tasty.
Have you ever had a pavlova? Traditionally, a pavlova is a disk of fresh-baked meringue, topped with whipped cream and fruit. The meringue is crisp and crunchy on the outside, and chewy-soft on the inside. Paired with fruit and cream, the texture of a pavlova dessert is unlike anything you’ve ever had, and truly special. They are beautiful desserts, and always elicit oooohs and aaaaahs, but believe me when I say, this recipe is so easy to put together.
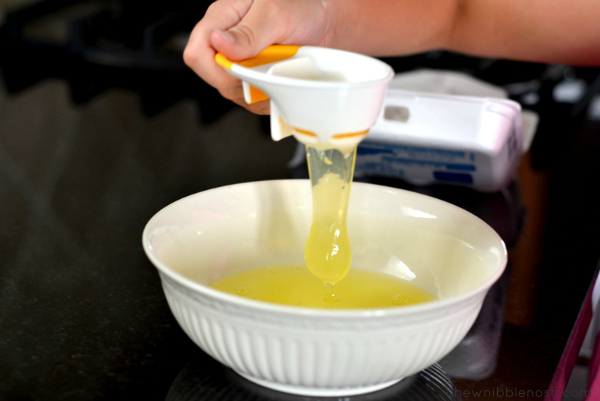
It’s so simple that my daughter Avery had no problem helping me when it came time to make it. There’s something really fascinating about separating an egg for kids, and in order to make the meringue layers for the pavlova, we’d need six egg whites, so I put her to work.
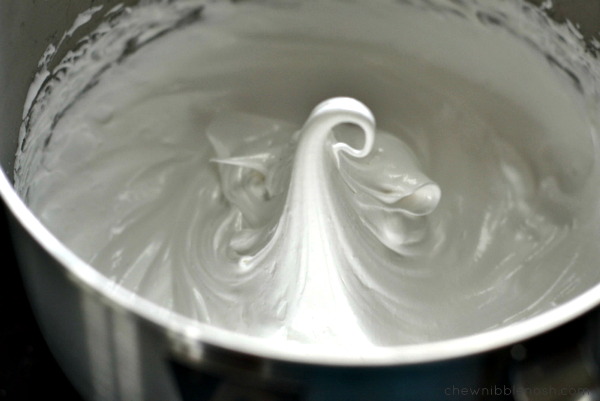
Once we had the eggs separated, we poured the whites into the bowl of my mixer, and beat them along with some Cream of Tartar until they were soft and fluffy.
Avery was on Soft and Fluffy Watch detail.
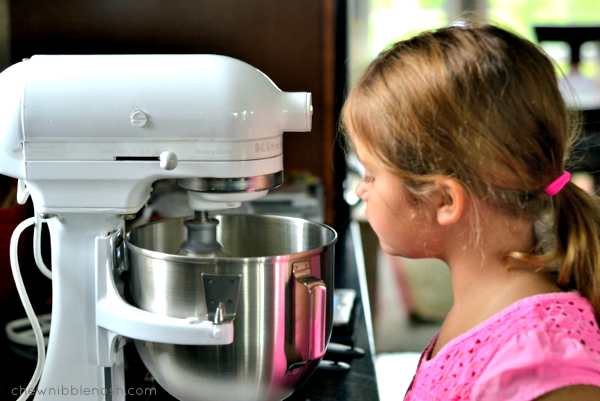
Once the mixture had reached soft peaks, we gradually beat in a cup and a half of sugar, and then continued to beat the mixture until those soft peaks moved into stiff territory.
When the mixture was shiny and looked a bit like sticky marshmallow, we were ready to stop.
I had lined two baking sheets with parchment paper, and traced around a 10-inch bowl to make a template for each meringue disk. I divided the mixture in half, and spread the meringue out to fill the circles on the sheets, making sure they were evenly spread, and as level as possible.
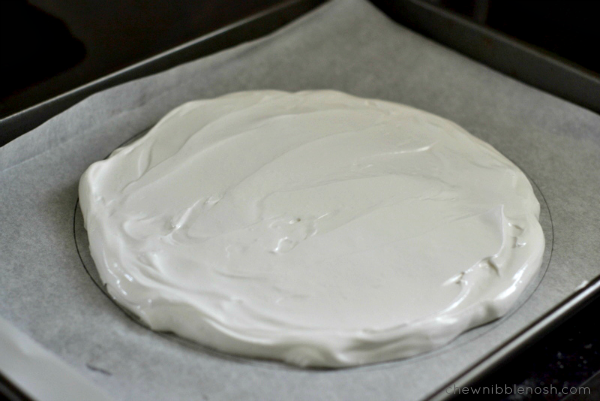
At this point, both cookie sheets of meringue went into a 250* oven for an hour and a half. During that time, at that low temp, the meringue puffs up just a bit, and dries out so you have that crispy, crunchy crust and chewy middle.
As the meringues were baking, I made the filling. I simply beat together some cream cheese and sugar, and then folded in some whipped topping and fresh orange zest.
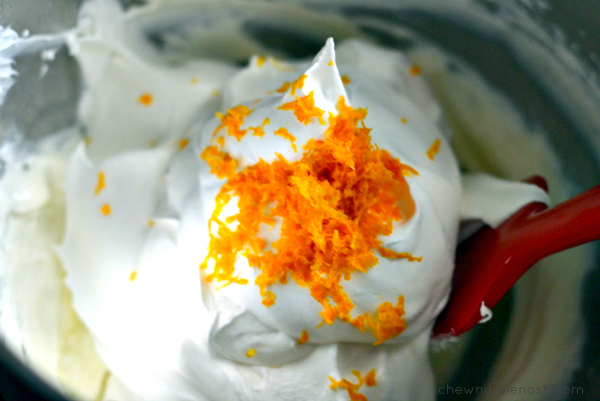
You could absolutely used fresh whipped cream in place of the whipped topping. I went the easy route only because I wanted to make the filling ahead of time and store it in the fridge until just before I served it. If you’re using real cream, you might want to make the filling closer to the time you use it, or add a stabilizer to the cream.
Once the meringues are finished baking, they’ll have toasted up just the slightest bit, and will probably have a few cracks around the edges. That’s ok. They need to cool completely before putting the dessert together, but that doesn’t take long at all.
When it’s time to put dessert together, I sliced up some strawberries and mixed them with some raspberries and blueberries. Any berry mix will do, you just need about 5-6 cups total.
I placed one meringue on my plate, spread half of the cream mixture over the top, and piled on half of the berries.
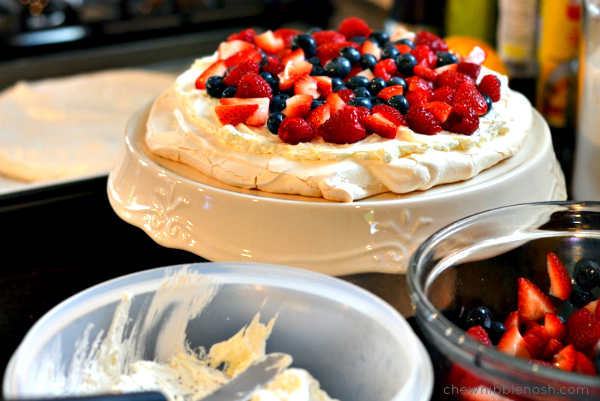
Then, I placed the other disk on top of that, and spread out the rest of the cream and the rest of the berries.
It’s as simple as that.
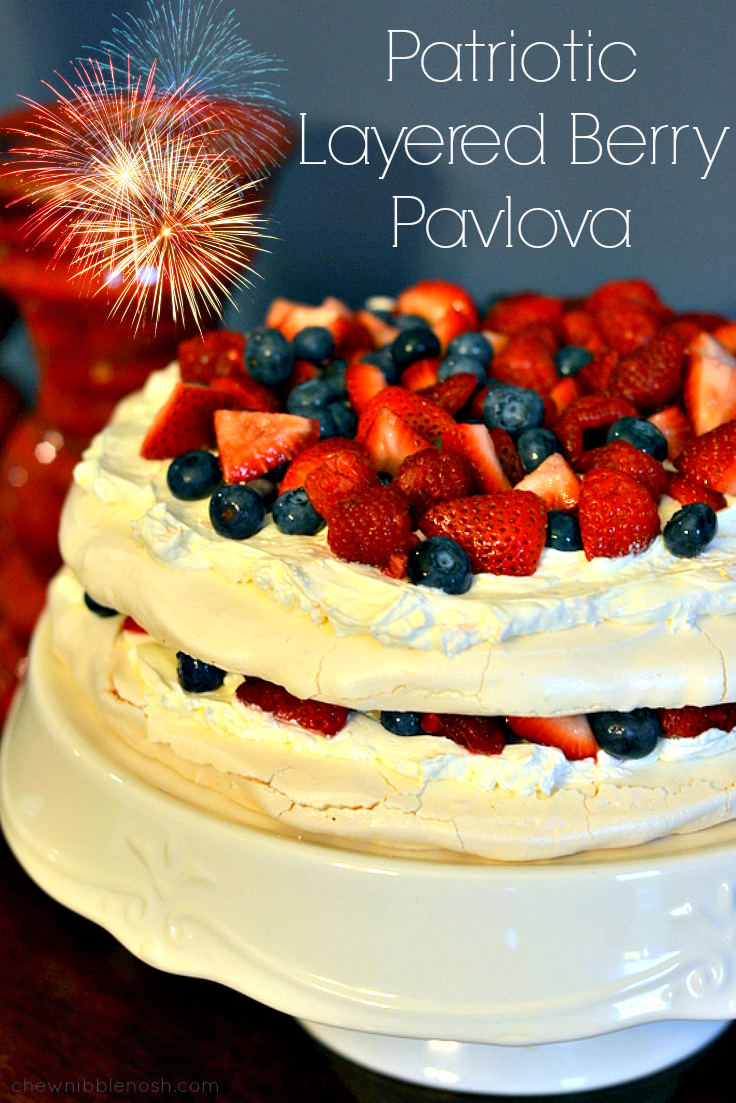
The double layer pavlova sliced beautifully, and my family was definitely wowed by this dessert! It looks so festive, and delicate, and is deliciously crisp and cool. It’s a perfect way to help celebrate a certain red-white-and-blue kind of holiday.
PATRIOTIC LAYERED BERRY PAVLOVA
Adapted from Kraft
- 6 egg whites
- 1/2 tsp. cream of tartar
- 1 3/4 cups sugar, divided
- 1 (8 oz.) pkg. cream cheese, softened (I used reduced fat)
- 1 (8 oz.) container Cool Whip, thawed
- 1 Tbsp. orange zest
- 5-6 cups fresh berries (I used raspberries, blueberries, and sliced strawberries.)
- Preheat oven to 250*F. Line two cookie sheets with parchment paper, and trace a 10-inch circle on each sheet. Set aside.
- Beat together the egg whites and cream of tartar until soft peaks form. Gradually add in 1 1/2 cups of the sugar, a tablespoon at a time, and beat until stiff peaks form.
- Divide the meringue between the two cookie sheets and spread the mixture out to fill the 10-inch circles.
- Bake the meringues for 1 1/2 hours. Remove from the oven and allow to cool completely.
- Meanwhile, beat the cream cheese and remaining 1/4 cup sugar together until creamy and smooth. Fold in the Cool Whip and orange zest. Refrigerate until you’re ready to put the dessert together.
- When you’re ready to serve dessert, remove one meringue disk and place it on a plate. Spread half of the cream mixture over the disk, and top with half of the berries. Place the second disk on top, and repeat the layers.
- Slice to serve.
- ENJOY!